
Last Updated on October 26, 2022 by admin
Did you know that the longest ever recorded tennis match was played over a period of three days and lasted a total of 11 hours and about 5 minutes? In 2010, Nicolas Mahut and John Isner treated fans to a rollercoaster of a game at the Wimbledon Grand Slam.
This is just to show you how mentally and physically taxing a professional game of tennis can be and why you need to practice as many tennis drills as possible.
Granted, not every game lasts this long. On average, a best of a three-set match should take just over 3 hours, which is still no easy feat. Professional tennis players are incredibly conditioned and fit.
Regardless of your skill level in the game, if you enjoy a tennis match now and again, you must build up your fitness levels and skills.
One of the best ways to do this is to run through numerous tennis drills. Many of these drills are designed to teach you the game while conditioning your body.
Why Tennis Drills Are Good for Your Game
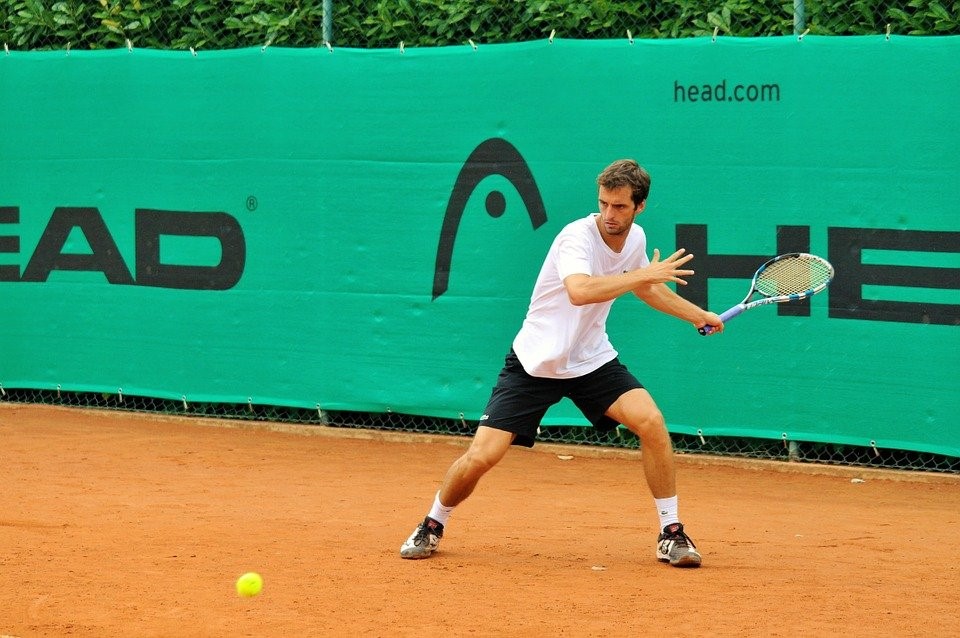
Should you hit that ball down the line or cross-court? When should you shift your body weight or split step to catch that serve just right? These are tennis techniques that take a lot of practice to master.
As is the case with any other game that is as complex and as physically engaging, practicing the various techniques has to be an almost daily activity.
Thankfully, many tennis drills are fun to practice. Apart from the fact that a tennis drill can be exciting, here are several other reasons why you need to include these drills as part of your day to day tennis routine:
- Improves your cardiovascular fitness: The more you run around and train during these drills, the fitter you become. Since a competitive game takes more than an hour, you need to be fit enough to keep running almost non-stop during that duration.
- Improves your skills: There is no mastering of skills without constant repetition, and that’s exactly what these drills provide – an avenue to repeat the various techniques to encourage mastery.
- Trains muscles: In any sport, there are very few things quite as reliable as muscle memory. That’s why pros practice almost every day so they can train their muscles to remember and instinctively react when the time is right. Different tennis drills will create muscle memory and teach your body to respond accordingly. Whether you want to master the backhand or forehand groundstrokes, some specialty shots, and even serves, training every day will help you do that and much more.
- Makes your timing better: In tennis, bad timing is your enemy. Not only can it lose you the game, but it can also put undue strain on your shoulders, wrist, and elbows. Some drills can help improve your timing greatly, which will make you a better player overall and minimize your chances of suffering unnecessary injuries.
- Improves your coordination: The more you practice, the more your hand-eye coordination, agility, balance, and footwork improve. These are all skills you will need to elevate your game.
Effective Tennis Drills to Elevate Your Game
With all this in mind, here are some drills you can start practicing today to elevate your tennis game:

1. Running the Lines
No, this isn’t an acting reference; it’s a tennis warm-up drill. This tennis drill will get your blood pumping and give you a chance to memorize the names of the lines that much faster.
Of course, the drill can be run at different paces depending on how fit you are, but it should be started at a jog before lunging into an all-out sprint at different intervals.
There are several ways to do this great drill, and every player has their own pattern. That being said, here are some of the most common and effective ways to run these drills.
When facing the net at one of the net posts (pick either one of the net posts), put one hand on the net then:
- Backpedal slowly to the baseline
- Sidestep and move to your left towards the singles sideline
- Jog towards the net and touch it
- Backpedal to the service line
- Sidestep again but to your right, this time towards the service center line
- Jog towards the net and touch it
- Again, backpedal to the service line
- Sidestep to your left towards the far singles sideline
- Jog towards the net and touch it
- Slowly backpedal towards the baseline
- Sidestep to the left towards the doubles sideline
- Jog back towards the net
As is the case with most drills, to scale it up, you need to pick up the speed or slow it down depending on your fitness levels.
2. The Frying Pan
In tennis, hand-eye coordination is one of the most important skills a player can master. Seasoned players take this for granted because they have conditioned themselves so well that it’s pretty much second nature to them.
However, beginner players may find this skill quite daunting and therefore need to practice more and more every day.
Many drills help with this, such as “The Dribble” (to be discussed a little later down this article). These drills help the players develop hand-eye coordination, but it also helps them become familiar with how the racquet feels in their hands and how it feels when the ball hits it. With that in mind, here are the steps you need to run “The Frying Pan” drill:
- Hold your tennis racquet in your hand with its face up, so it looks like you are holding a frying pan
- Slowly and carefully place a tennis ball on the racquet strings
- Gradually, start bouncing the ball on the racquet by moving its head slowly up and down
- Keep the ball bouncing at an even tempo for as long as possible
It sounds simple enough, and to some players, it will be simple. This is especially true if these players simply have a natural knack for hand-eye coordination or have developed some other sport skills.
However, this won’t be as simple for the vast majority of people, but it can be learned with practice. How well you do on the first try will give you a clear indication of how much work you need to put in before moving on from this most basic tennis skill.
As is the case with every drill, the more confident you become in executing it, the more complex you should make the drill to improve your skills. In this case, twisting the racquet 180 degrees between bounces is a good place to start complicating matters.
3. The Dribble
It’s very much like it sounds – dribbling the ball. It’s the very same skill basketballers need to master and perform countless drills to do so.
In the case of a tennis player, however, “The Dribble” is performed using their racquet instead of their hands. It’s an upside-down version of “The Frying Pan.” Here is what you need to do:
- Hold your racquet in your dominant hand, so it looks like you are holding a frying pan
- Instead of placing the ball on the racquet, this time simply bounce the ball off the ground right in front of you
- As it bounces back up, hit it with your racquet, so it goes straight back down to bounce back up again
- Repeat this motion until you have a steady dribble going
To complicate matters, you can rotate your racquet 180 degrees in between bounces, you can switch racquet hands, and you can walk around the tennis court (strictly following the lines if you want).

4. The Serve Toss Drill
This is yet another skill that calls for excellent hand-eye coordination. Unfortunately, most beginners will find it quite difficult to execute the serve toss – a rather necessary part of the game.
To master this skill, you can simply employ “The Serve Toss Drill.” The good news is that you don’t even need a tennis court to do this; you can just do it at home:
- Find an open space where you can ball toss high up in the air
- Get into your comfortable serving stance
- Using your non-dominant hand, ball toss up high in the air as if you intend to serve
- Once the ball leaves your hand, keep that arm in the air with the palm facing you – the idea is to try and catch the ball without turning your palm
Practicing every day will allow you to feel the serve toss and make you more comfortable when you introduce a racquet into the mix.
5. The Volley-To-Volley Drill
This is a drill designed to greatly improve your reflexes as well as your volleys. You can do this with a hitting partner or against a smooth wall, depending on what you prefer. Here are the steps involved:
- Using the continental grip, stand about 15 feet apart from your hitting partner or the wall
- Begin by gently volleying the ball to your partner or the wall
- Avoid letting the ball hit the ground
The more comfortable you get with the volley, the faster and more complicated they should become. You can perform this drill by using your forehand or backhand as necessary.
Just make sure that if you are using the backhand, then it’s the backhand only for the designated duration to ensure that you get a good feel for that and develop muscle memory.
6. The Groundstroke Drill
Your groundstroke skills will come in handy in a competitive game when you want to throw your opponent off their game. To master this skill, you’ll need to frequently perform “The Groundstroke Drill.” You’ll need a partner or a coach for this drill:
- Standing about 15 feet apart, throw the ball at your coach, making sure it hits the ground first
- The coach or partner then throws the ball back at you at the same pace and in the same manner
- Determine whether you want to do backhand strokes and stick to those or forehand strokes and stick to those
- Increase the distance and velocity of the throws as you get into the drill
Once you have a good feel for the throw, you can introduce directional throws to train for side steps. You can further complicate matters by introducing rackets and a net the more comfortable you get.
The more you practice each tennis drill, the better, the faster, and the fitter you will become as a tennis player.